Creating Demand Views
Each user creates personal demand views, but these views can be shared with other users.
To create a demand view:
- Select the Demand tab.
- From the Configure menu, select New Demand View.
-
On the
Details tab, provide the following:
- Name
- Description
- Demand Category
Select an appropriate category for your view. Categories are defined by an administrator.
- Reports
Click the Another Report link to add reports to your view. On the Add Report page, type the name of the report you want to add, select the application that contains the report from the list, and then click Go. When the report is returned, select it in the list, and then click Add.
-
On the
Sharing tab, search for and select users with whom the
demand view will be shared. Administrators can also share views with groups.
Views are automatically shared with the manager specified in the plan owner's
resource record. Each person sharing the view can:
- View and analyze demand items in the view.
- Send items to analysis.
- Move items to plans they own.
- Move items to a backlog.
- Reject items.
- Click OK.
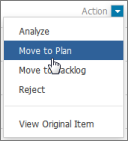
Acting on Items in Demand Views
- Analyze
Before demand items are assigned to a plan, they typically are analyzed by demand analysts, planners, managers, and other stakeholders. When you send a demand item to analysis, select a priority and completion date for the analysis, along with participants in the process. For details, refer to Analyzing Demand Items.
- Move to Plan
Move items to a plan you own. For details, refer to Adding Demand Items to Plans.
- Move to Backlog
Move items to a backlog you own. You can also send items to the default backlog if your administrator has shared it with you. For details, refer to Working with Backlogs.
- Reject
Reject items to remove them from all demand views. For details on rejected items, refer to Working with Rejected Items.
- View Original
View demand item details.
Except for Reject, each of these actions causes items to be paused. For details on pausing, refer to About Demand Item Pausing.
Adding Demand Items to Plans
Items can be added to plans from demand views. Items can only be added to a plan by the plan owner.
To add demand items to plans:
- From the Demand tab, select a demand view.
- Select the New or Analyzing tab.
-
Perform one of the following:
- Drag individual items into a plan folder at the bottom of the page.
- Select
Move to Plan from the Action list:
- Select the plan on the dialog box that opens, and then click Move. The demand item is removed from all demand views once it is added to a plan.
Working with Rejected Items
You can reject items that are in a demand view or in analysis. Rejected items are "unpaused" and are visible by clicking the Rejected button in a demand view.
You can return rejected items to analysis, move them to a plan, or move them to a backlog.
To reject an item:
- In a demand view, select either the New or Analyzing buttons.
- For a specific demand item, select Reject from the Actions menu.
- Provide a reason for rejecting the item, and then click Reject.
Deleting Demand Views
Deleted demand views are no longer available to the owner or sharers, but demand items added to plans from that view are not impacted. You cannot delete demand views that have items in analysis, however.
To delete a demand view:
- Select the Demand tab.
- In the Navigation pane, select the demand category that contains the view you want to delete.
-
Select the delete icon (
 ) next to the view
title.
) next to the view
title.
- Click OK to confirm that you want to delete the view.