The Demand Plan process app moves plans through a life cycle from
proposal to completion, as described in
About the Demand Plan Process App.
Depending on your role in the Demand Plan process app and the current state of
a plan, you can perform various life cycle actions in
Demand Center.
Plan life cycle tasks include:
Use the drop-down list in the upper right corner to move the plan
through its life cycle in the Demand Plan process app.
Moving Plans to "In Flight"
After planning is complete for some or all of the items in a plan,
select
Finish Planning:
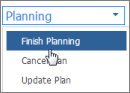
Note: Planning must be complete on at least one item in the plan
before you can move a plan to in flight.
The
Finish Planning form from the Demand Item application opens.
Depending on your organization's process, you can:
- Select "Yes" from the
Requires Sign-off drop-down to send the plan to those
selected in the
Plan Reviewers field.
- Select "No" from the
Requires Sign-off drop-down to bypass sign-off and send the
plan directly to in flight.
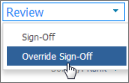
If your plan requires sign-off, it will be sent to the in-flight
phase after all sign-offs are complete. Plan owners can override this sign-off
if reviewers are unavailable by selecting Override Sign-Off from the actions
menu:
Once a plan is in flight, the planned items are "unpaused" and can
follow the regular process in their demand item application.
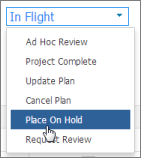
Placing a Plan on Hold
To accommodate changing business priorities, you can place a plan on
hold when it is in flight or in review. Demand items assigned to the plan are
paused, and the capacity for teams assigned to the plan is adjusted to remove
the allocations for the demand items assigned to the plan.
To place a plan on hold:
- From the
Planning tab, select the portfolio containing the plan to
place on hold.
- Select the plan.
- From the actions menu, select
Place on Hold.
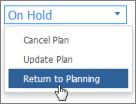
You can later reactivate the plan and return it to the Planning
state. Demand items are also returned to the planning state and remain paused
until planning is complete. Resource estimates are recalculated and added to
the plan's capacity.
To reactivate a plan:
- From the
Planning tab, select the portfolio containing a plan that is
on hold.
- Select the plan.
- From the actions menu, select
Return to Planning.
Canceling a Plan
Plan owners can cancel plans that are no longer valid. Plans can be
canceled when they are planning, in flight, or in a scheduled or ad hoc review.
Demand items assigned to canceled plans are "unpaused" and returned
to demand views as "rejected" if they meet report criteria for the view.
To cancel a plan:
- From the
Planning tab, select the portfolio containing the plan.
- Select the plan.
- Select
Cancel Plan from the actions menu.
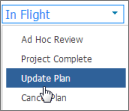
Handling Plan Reviews
In-flight plans can be sent to review at one of these points:
- Scheduled Reviews
Scheduled reviews during the in-flight phase are determined by
settings made for the plan in the Demand Plan application. Depending on your
organization's process, plans may be automatically sent to review one day
before the scheduled review.
- Ad-hoc Reviews
At any time during the in-flight phase, plans can be sent to
ad-hoc review directly from
Demand Center.
- Plan Completion Reviews
When all of the work in plan is completed, the plan owner
selects
Project Complete from the actions menu to send the plan to
a final review.
- Review Requests
Plan participants (owners, reviewers, stakeholders, and
approvers) can request a review at any time.
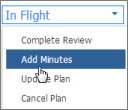
During the review, you can add minutes to the
plan directly from
Demand Center:
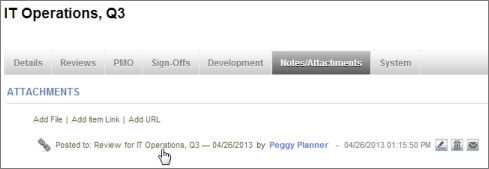
Minutes are stored in the Demand Plan Review Results auxiliary table
and can be viewed on the
Notes/Attachments tab of the plan in the
SBM User Workspace.
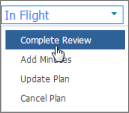
When the review is finished, select
Complete Review from the actions menu to open the plan and add
work notes and other information as needed.
Adding New Items to In-flight Plans
At times, you may need to add a new demand item to a plan that is in
flight. Once planning is complete for newly added items, the plan must be sent
to review and approved again. Newly items remain paused until this approval
process is complete.
When the review is complete, new items are automatically moved to
execution.
Changing a Plan Owner
Plan owners are responsible for adding items to plans, allocating
and monitoring resources, conducting reviews, and ensuring a plan is signed off
and completed.
If a plan owner is unavailable, you can delegate the plan to another
owner, as long as the new owner has appropriate privileges in the Demand Plan
process app.
To change a plan's owner:
- From the
Planning tab, select the plan.
- Select
Update Plan.
- Select the
Details tab, and then select the new owner from the
Plan Owner field.
- Click
OK.
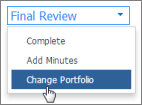
Completing a Plan
Once all work has been completed on items in a plan, you can close
it by selecting
Project Complete. This closes the plan in the Demand Plan
process app.

 ).
).