Click Reports in the SBM side menu to search for, create, and manage reports in SBM.
Use the legend below to learn more about managing reports in SBM.
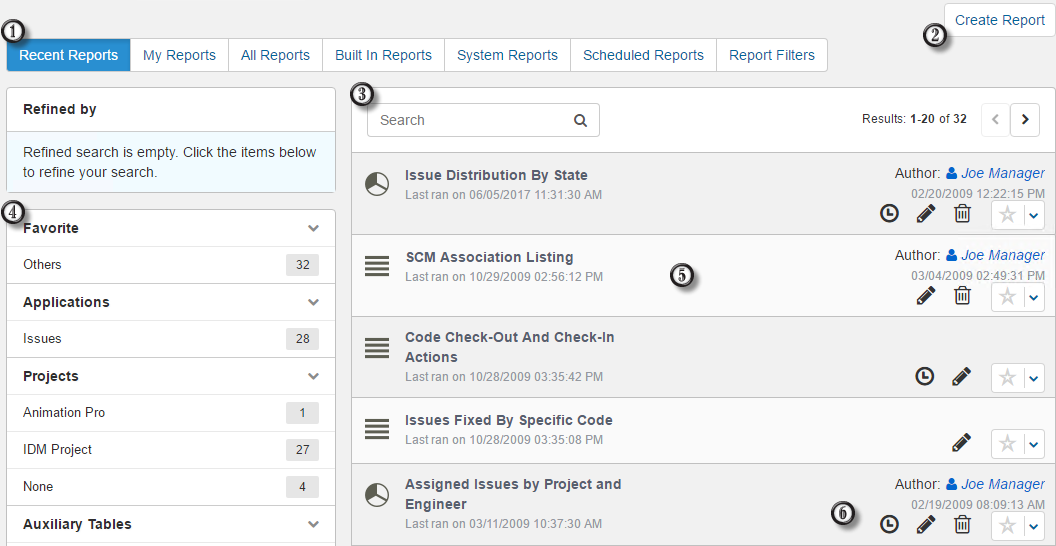
- Select a category. The categories appear in a drop-down list or in a
row depending on the current browser size. Choose to view reports from these
categories:
- Recent Reports
See the most recently run reports. Results are limited to 200 reports.
- My Reports
See reports that you created.
- All Reports
See all reports that you can access. Reports are listed alphabetically.
- Built In Reports
See all built-in reports for the selected application or application group. SBM provides a set of built-in reports that you can run for every application that you can access. The default set of built-in reports available to you depends on your product-access level.
- System Reports (On-premise only)
See reports that provide information about administrative aspects, such as fields, user privileges, group membership, user activity, and more. Typically, System reports are only available to administrators. They cannot be deleted or customized, nor can new System reports be created. For details, refer to the SBM Reporting Guide located on the Documentation Center.
- Scheduled Reports
Lists reports that are scheduled to run at a particular time. Results are sent to your e-mail address. For details, refer to Scheduling Reports.
- Report Filters
Lists available report filters that can be used in a report's Search Filter to limit report results. For details, refer to Using Report Filters.
- Recent Reports
- Click to create new custom reports. For details, refer to Creating Reports.
- Search for reports within the selected category.
- Filter the list of reports by favorites, application, project,
auxiliary table, report type, access level, or author.
Note: If too many items are returned in any category, you can search the results lists. For example, if more than 10 applications are returned, you can search for a specific application in the result list.
- Click a report row to run the report.
- Click on the icons in a row to:
 :
Schedule the report to run at a specific time and send results to you by
e-mail. Refer to
Scheduling Reports.
:
Schedule the report to run at a specific time and send results to you by
e-mail. Refer to
Scheduling Reports.
 : Edit the
report. Refer to
Editing Reports.
: Edit the
report. Refer to
Editing Reports.
 : Delete the
report. Refer to
Deleting Reports.
: Delete the
report. Refer to
Deleting Reports.
 : Favorite
a report. This pins a report to the side menu (indicated by a yellow star). You
can also drag and drop a report to the side menu to make it a favorite.
For details, refer to
Customizing Your Menus.
: Favorite
a report. This pins a report to the side menu (indicated by a yellow star). You
can also drag and drop a report to the side menu to make it a favorite.
For details, refer to
Customizing Your Menus.
 : Using
the drop-down list, you can:
: Using
the drop-down list, you can:
- Add the report to your quick links or folders (for details, refer to Managing Links).
- Copy the report URL to the clipboard.