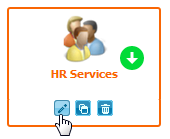
Use containers to organize categories, which contain sets of services requests.
Creating Containers
To create a category container:
- Select Customize | Container Category.
- Enter a Name and Description.
- Choose a display image by clicking Change image. You can choose from existing images or insert a URL. For best results, use an image that is 64 x 64 pixels. For information about the image picker, see Using the Image Picker.
- Select the Display Order for the category by dragging the slider. The lower the number, the further to the left it will appear.
- Select a parent container. If you do not select a parent container, your new container is shown on the Home view.
- Click Save.
Creating "Nested" Containers
You can "nest" containers to create a hierarchy.
To nest containers:
- Create a container, and then select None from the Parent Container drop-down list.
- Create additional containers, and then select the parent containers from the Parent Container drop-down list.
- Add categories to each container as needed. Refer to Creating Categories.
Modifying Containers
- Navigate to the container you want to modify, and then select the container.
- Select Customize | Service Request Catalog.
- Click on the appropriate icon to edit, copy, or delete the
container.

Note: If you attempt to delete a parent container that contains
categories, you are warned that you must first reassign the categories to
different containers.