You can design component processes to tell Deployment Automation what to do when you deploy components.
You design processes using the process editor. In the process editor you drag process steps from a menu of steps onto the design space and configure them immediately. As you place additional steps, you visually define their relationships with one another.
The process designer with a component process is shown in the following figure.
Component Process Design
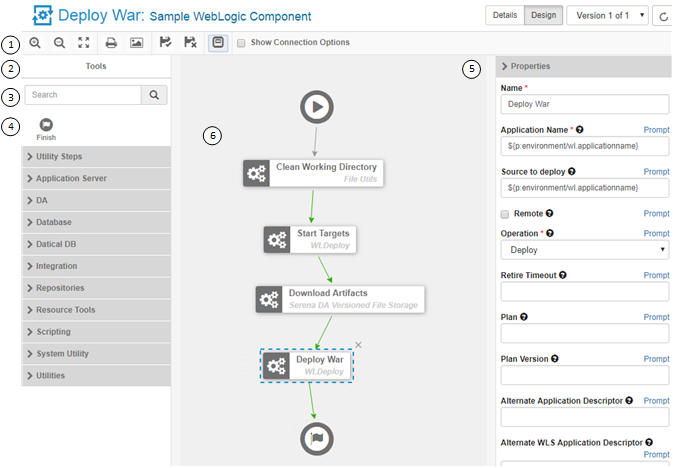
- Select from the following in the process designer tools palette:
- Zoom In
- Zoom Out
- Actual Size
- Poster Print
- Save
- Cancel
- Outline Box: Use this to move the whole process design around in
the design area. For example:
- Drag its corner inward and move it over parts of the process design to zoom in.
- Drag its corner outward again to zoom out.
- Show Connection Options: Select this to show the options for all connections.
- In Tools, select process steps.
- Use the Search box to find a step by name.
- Select and drag plugin steps to the design area to add them to your process.
- Properties are automatically shown when you select a step.
- Connect process steps and edit or delete existing steps or
connections.
Tip: Select a connection to explicitly show its options if the Show Connection Options is not selected. Connections are color-coded for the process path: Success (green), Failure (red), and Always (gray).