Depending on your privileges, you can create reports that are associated with a specific application or solution. This enable you to quickly and easily access the report as you work with an application.
To create a report:
-
Use one of these options to open the Report Center:
- In the navigation menu, click Report Center.
- Click the
Manage Views icon (
 ) located in the navigation menu, and then click the
Reports menu header.
) located in the navigation menu, and then click the
Reports menu header.
- Click the Create Report button located in the upper right corner. If you are in the Manage Views page, you can also select Reports from the menu, and then click the blue plus sign. The New Report page opens.
- Select a report category such as List, Distribution, or Duration.
-
Review the available report types for that
category.
Tip: Under each tab, click on a report type to view a sample image of the report. For certain types of reports, you can then hover your mouse over the styles that appear above the sample image to use the style that appears.
For example, under Trend, click the Backlog report, and then hover over the Horizontal Bar template to change the preview image.
- Click the report type name, icon, or the sample image to begin creating a report using the selected template.
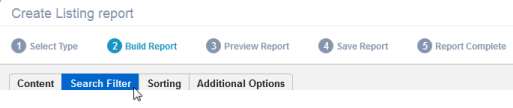
-
Click the tabs at the top of the page to set content, search,
sorting, and other options.
- Once report criteria is set, click Preview to review results. You can then either save your results or click Back to refine report criteria.