To place existing Eclipse projects under Dimensions CM control, you must share your Eclipse project with Serena Dimensions CM. If you are working with Eclipse project containers, see Adding Eclipse Projects to Project Containers.
|
To share a project with Serena Dimensions CM:
In Eclipse, right-click the project icon and select Team | Share Project.
The Share Project dialog appears.
Select Serena Dimensions from the Select a repository type list and click the Next button.
The Select Connection panel appears.
Select one of the following choices:
Create a new Dimensions connection, which will allow you to create a new connection to a Dimensions CM server.
Use existing Dimensions connection and choose one of the existing Dimensions CM connections from the list.
If your current Eclipse session is not yet logged in to Dimensions, the Dimensions Login dialog box appears. Log in to Dimensions.
The Project Selection panel appears.
Select from the following choices. The options available here depending on how your administrator has configured your Dimensions intallation. You may be able to use Dimensions project, streams, or both.
Create a new Dimensions Stream to create a new stream in Dimensions and connect it to the Eclipse project.
Create a new Dimensions Project to create a new project in Dimensions and connection it to the Eclipse project
Use existing Dimensions Project, which allows you to choose an existing project from the tree.
Use existing Dimensions Stream, which allows you to choose an existing stream from the tree.
To add the project to a Dimensions project container, select Create in Eclipse Project Container. For details on working with project containers, see Using Eclipse Project Containers.
If you chose to create a new stream or project, you must complete one of the following steps:
For a new stream, select the product, enter a stream name and description, and name the unique branch that will be used to identify file revisions stored in the stream. You can also set a container offset and choose the design part for new items by clicking the Show Advanced Settings button.
For a new project, select the product, enter a project name, select a project type, and enter a description. You can also set the Container Offset and Design Part for New Items by clicking the Advanced button.
|
If you are working with project containers, see Adding Eclipse Projects to Project Containers.
Click Next.
If you are creating a new stream, complete the Additional Details dialog box and click Next. If you are creating a new project, skip ahead to the next step. Complete the following options on the Additional Details dialog box:
From the Based On group, choose Nothing to create an empty stream, or choose Based on Stream or Based on Baseline to populate the new stream with items from an existing stream or baseline.
Under Change Management Rules, you can choose whether to require users to specify valid change requests when delivering their local changes to the stream.
If you chose to create a new project, complete the following steps:
Complete the Based-on dialog box and click Next:
Choose the Nothing option to create an empty project.
Choose Based on another Project or Based on Baseline to populate the new project with items from an existing project or baseline.
Complete the Options dialog box and click Next:
Under Version Management Options, choose whether or not to create branches when new versions of files are created.
Select Allow user to override default version number if you want users to be able to enter non-default version numbers when creating new file versions.
Under Change Management Rules, choose whether to always enable or always disable change management rules in the new project, or to use the change management rules set on item types.
Select the Request required to refactor option if you want to require users to associate a change request to any refactoring activities, such as moving and renaming files.
On the Named Branches dialog box, select valid named branches for the new project. CTRL+click to select multiple branches. Choose a default named branch from the Default Branch list. Click Next.
On the Attributes dialog box, set values for any user-defined attributes that you want to define for this project. Click Next.
Review the the Sharing Summary dialog box to ensure that the share settings are correct.
Do any of the following:
Select Add workspace files to source control to automatically add the files within the project to Dimensions CM source control.
Select Open Synchronize View when done sharing to display the synchronize view which allows you to synchronize your local files with the Dimensions CM repository. See "Synchronizing Your Workspace with Dimensions CM Repository" on page 44 for details on using the Synchronize View.
Click Finish.
Depending on your selections, any of the following may happen:
A new project or stream is created in Dimensions CM for your Eclipse project, or the Eclipse project is added to a sub-folder in a project container.
The Synchronize View appears allowing you to place files into the Dimensions CM repository.
|
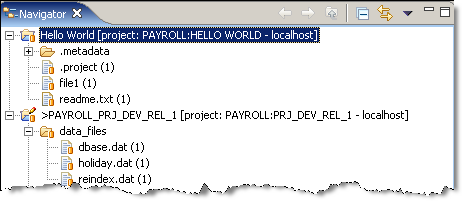
After your project is placed under control, a gold cylinder (![]() ) is added to the icon of each item to indicate that the item is under source control. The Dimensions CM information for the project, including its product and Dimensions CM project name, appears in brackets alongside the Eclipse project name.
) is added to the icon of each item to indicate that the item is under source control. The Dimensions CM information for the project, including its product and Dimensions CM project name, appears in brackets alongside the Eclipse project name.
|