Select the projects that you want to synchronize with the Dimensions CM repository.
Right-click and select Team | Synchronize with Repository.
The Team Synchronizing perspective appears.
Use the features in the Team Synchronizing view to evaluate the files that differ from source control, and choose whether to synchronize, check in, or merge the changed files.
If you are using Dimensions streams and you have switched the mapping of your workspace project to a different stream from the one it was originally shared with or added from, the Synchronize view represents the content of a streams from the perspective of the contributor stream. It displays incoming changes from the contributor stream and performs checks to ensure that any files deleted in the home stream are not added back if they are still present in the contributor stream.
NOTE If you are using the Wind River Workbench product, the Hierarchy of the Wind River projects will be used to determine the set of Eclipse projects to synchronize.
About the Team Synchronize View in Eclipse
The Team Synchronize view in Eclipse displays when you select Synchronize with Repository. The Synchronize view allows you to inspect the differences between the local Workbench resources and their remote counterparts, as well as update resources in the local Workbench or commit changes/resources from the local Workbench to the Dimensions CM repository.
The Team Synchronize view has many features that help you to perform the synchronization with the repository, such as:
-
Commit Moves—The commit move operation updates the Dimensions CM repository with information from files which have been moved or renamed.
-
Synchronization states—Synchronization states show the state of resources in your local workspace compared to those residing the Dimensions CM repository.
-
Modes—The different synchronization modes (Incoming, Outgoing, Incoming/Outgoing, Conflicts) allow you to filter the differences, helping you to find the differences to be resolved based on your company's work flow.
-
Conflict Handling—Conflicting resources can be merged (instead of overwriting) using Team Synchronization by performing either an update or a compare to merge the differences. You must use a Compare editor to compare and resolve conflicts. A Compare editor can be opened by choosing Open in Compare Editor from the context menu. The Compare editor allows you to manually resolve the conflicts in the file. Once completed, perform a Mark as Merged on the conflict to indicate that you are done. This will change the conflict into an outgoing change.
Viewing Project Properties
Serena Explorer allows you to access project attributes, history, relationships, and default working branch through a single dialog.
Procedure
To view source control information:
-
In Serena Explorer, right-click the project node and select Properties.
The Properties dialog appears for the project.
On this dialog, you can choose the Project Working Request or the Project Working Branch for the project:
-
The Project Working Request is the default request that is used to be related in response to new item revisions that you create in this project.
-
The Project Working Branch is the default branch on which new item revisions that you create in this project will be placed.
From the project properties page, you can also select the default library cache area. Selecting a library cache area for your project can increase the response time when contacting Dimensions CM. See the Serena Dimensions CM User's Guide for more information on library cache areas.
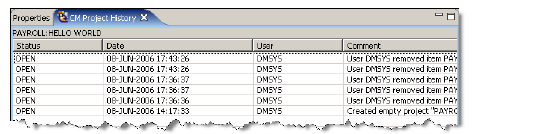
Viewing the History of a Project
The history of a project shows the previous actions on the project, such as the addition of files or the creation of baselines. The Project History is the history of a specific Dimensions CM project. It contains all file changes, similar to the Dimensions CM Desktop client. The history of an Eclipse Project is all the projects and baselines logically in the Eclipse project, such as derivations.
To display the history of a project, in Serena Explorer, right-click the project node and choose Project History.
The list of actions appear in the Project History tab.
About Merging Streams
Consider the following recommendations when working with Dimensions streams that you will merge:
-
Use multiple workspaces; one for the mainline stream, and one for each branch stream.
-
To merge content from the mainline stream to a branch stream:
-
Switch the branch workspace project to the mainline stream.
-
Synchronize to update the branch workspace with changes from the mainline stream.
-
Test and validate the merge results, then switch the branch workspace project back to the branch stream.
-
Deliver the changes to the branch stream.
-
To merge content from a branch stream to the mainline stream:
-
Switch the mainline workspace project to the branch stream.
-
Synchronize to update the mainline workspace project with changes from the branch stream.
-
Test and validate the merge results, then switch the mainline workspace project back to the mainline stream.
-
Deliver the changes to the mainline stream.