Components represent deployable artifacts: files, images, databases, configuration materials, or anything else associated with a software project. Components have versions, which ensures that proper component instances are deployed.
When creating a component, you identify the source configuration type and import the initial version.
- Navigate to Management > Components.
-
Click the
Component Actions button and then select
Create Component.
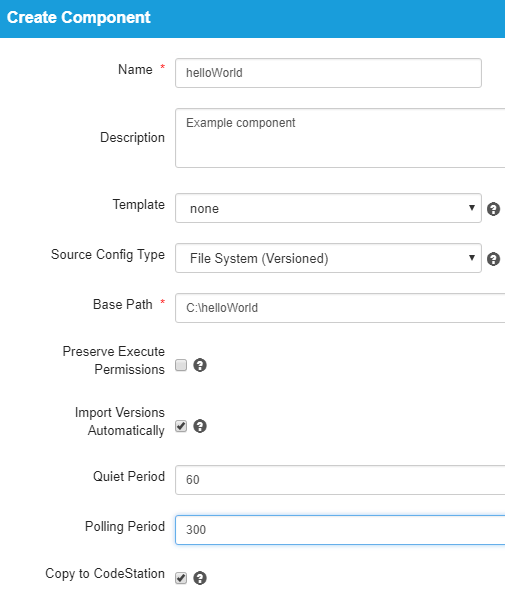
The initially-displayed fields are the same for every source configuration type. Other fields that appear depend on the source configuration type and are displayed after a value is selected in the Source Config Type field.
-
Enter
helloWorld in the
Name field.
The name is used when configuring the application. If the component will be used by more than one application, the name should be generic rather than project-specific. For components that are project-specific, a name that conveys something meaningful about the project should be used.
-
Enter a description in the
Description field.
The optional description can be used to convey additional information about the component. If the component is used for the database portion of one or more applications, for example, entering "Used in applications A and B" can help identify how the component is used. If you are unsure about what to enter, leave the field blank. You can always return to the component and edit the description at any time.
For this exercise, ignore the Template field. Templates provide a way to reuse commonly used component configurations.
-
Select
File System (Versioned) from the
Source Config Type field.
Several fields appear that are required by the selected type.
File System (Versioned) is one of the simplest configuration options and can be used to quickly set up a component for evaluation purposes, as we do here. This option uploads whole directories as component versions relative to the Base Path.
Creating a Component
-
Complete this option by entering the path to the artifacts.
In our example, the artifacts are stored inside the subdirectory created earlier. The base path is C:\helloWorld. Within helloWorld is the single subdirectory version1 on your local machine.
File System (Versioned) assumes that subdirectories within the base directory are distinct component versions, which is why we placed the files (artifacts) inside a subdirectory. File System (Versioned) can automatically import versions into CodeStation. If a new subdirectory is discovered when the base directory is checked, its content is imported and a new version is created.
-
Check the
Import Versions Automatically check box.
When this option is selected, the source location is periodically polled for new versions. If this option is not selected, you must manually import a new version each time one becomes available. Set Quiet Period to 60 and Polling Period to 300 to give time for adding new folders and files between automatic imports of the artifacts.
-
Ensure the
Copy to CodeStation check box is selected.
This option, which is recommended and selected by default, creates a tamper-proof copy of the component's artifacts and stores them in the embedded artifact management system, CodeStation.
For this exercise, you can accept the default values for the remaining options and save your work.
- After the interval specified by the system settings, the initial component version, the files in the version1 subdirectory created earlier, should be imported into CodeStation. To ensure the artifacts were imported, navigate to Management > Components > helloWorld > Versions > version1. This displays all artifacts for the selected component version. If things went well, the five artifacts you created, artifact1.txt through artifact5.txt, will be listed.