If an application environment requires approvals, you must design an approval process for it.
You design processes using the process editor. In the process editor you drag process steps from a menu of steps onto the design space and configure them immediately. As you place additional steps, you visually define their relationships with one another.
To create an approval process:
- To activate the options to create an approval process for an application environment, you must first select the Require Approvals option for the environment. See Adding Environments to Applications.
- Navigate to Management > Applications > [select application].
-
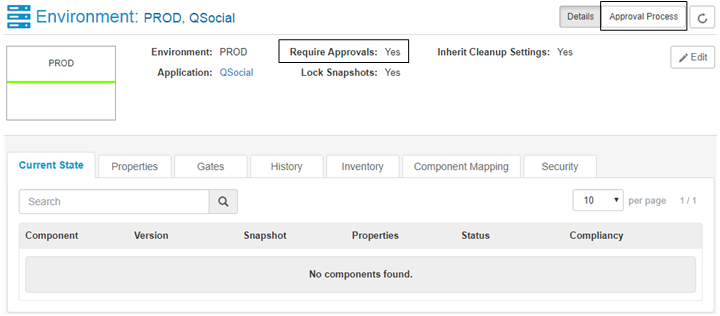
Click the environment name for which you want to create, design,
or edit an approval process and then select
View Details.
The Approval Process button appears at the upper right of the page and the environment information indicates that approvals are required. If these do not appear on the page as shown in the following figure, see Step 1.
-
Click the
Approval Process
button.
The process designer for the approval process appears as shown in the following figure.
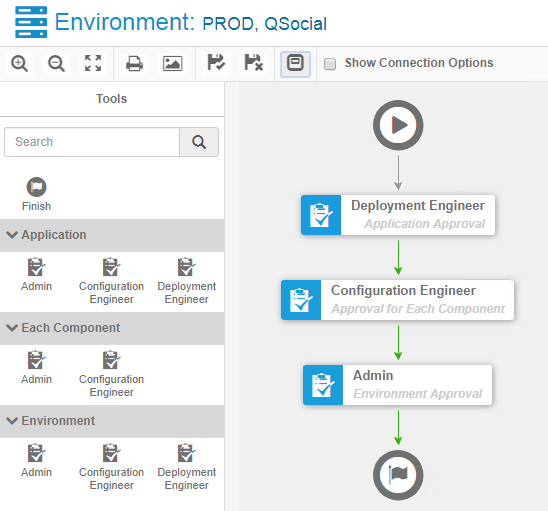 Available approval steps are based on the security roles for the corresponding entities:
-
Applications
-
Components
-
Environments
-
- Expand the approval levels and drag a security role to the design area to create an approval step. Do this for each role that you want to approve process requests for this application, its components, and this environment. You can define steps for each level and role as needed. Any users assigned to the role on the corresponding entities, either directly or as part of a group, have permission to approve.