To complete the process, you define the actual plugin steps. In addition to the Start and Finish steps, which are part of every process, a process must have at least one additional step. The steps are defined using the process editor. You define the steps by dropping them onto the design area and arranging them in the order they are to be executed.
To define the helloWorld process steps:
-
Navigate to the process you just created, which in the example we
used would be
hello_worldInstall.
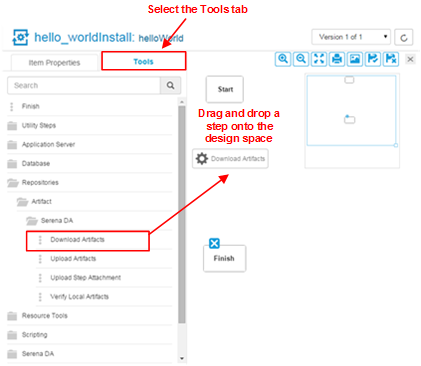
The steps are listed on the Tools tab. Take a moment to expand the listings and review the available steps. Many commonly used plugin steps are available in the default installation.
- Expand the menu item Repositories > Artifact > DA.
-
Drag the
Download Artifacts step onto the design space and
release it. For now, don't worry about where the step is released. A step's
position in the workflow is defined after its parameters are configured.
Figure 1. Adding a Step to the Process
The Item Properties tab is displayed when the mouse-pointer is released over the design space.
This tab displays all configurable parameters associated with the selected step.
For this exercise, we can achieve our goal by entering data into a single field, Directory Offset. Recall that the goal for this ambitious deployment is to move the source files in the base directory to another location. As you might guess, several methods for accomplishing this are available. Pointing the Directory Offset field to the target location is one of the simplest.
-
In the Directory Offset field, enter the path to the target
directory. Because
Deployment Automation
can create a directory during processing, you specify any target directory.
Let's enter
C:\hello, which does not exist on our system, and
let
Deployment Automation
create it for us.
If the field is left blank, the process will use the working directory defined earlier. Entering the path overrides the previous value and will cause the source files to be moved, or deployed, to the entered location when the process runs. The default value would copy, or download, the files to agent_directory\work\component_name_directory.
-
Next, the step must be positioned within the process workflow.
There's no requirement that a step be positioned perfectly after it's created;
you can place several more before defining their positions, but because this is
the only step we are adding, it makes sense to define its position now.
A step's position in the workflow is defined by dragging connection arrows to/from it. The arrows define the direction of the workflow.
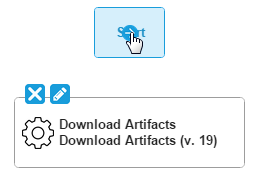
Point to the Start step to display the connection tool, as shown in the following illustration. Each step has a connection tool, which is used to connect it to other steps.
Figure 2. Connection Tool
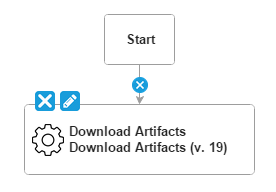
Grab the connection tool and drag it over the Download Artifacts step then release it. A connection arrow connects the two steps. The arrow indicates the direction of process flow, from the originating step to the destination step.
Figure 3. Finished Connection
-
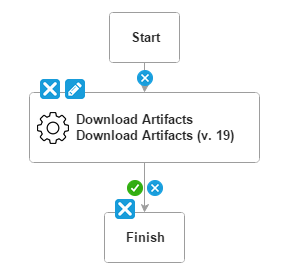
Complete the process by connecting the
Download Artifacts step to the
Finish step. A step can have more than one arrow
originating from it and more than one connecting to it.
Figure 4. Completed Process
-
Save the component by clicking the
Save icon (
 ). To exit the process
editor, click the
Close icon (
). To exit the process
editor, click the
Close icon ( ).
).
Once the process steps are defined, the final task is to define an application that uses the component and the component process you just created.