After an agent is installed and communication is established between the server and agent, the agent will be visible in the Deployment Automation user interface where it can be configured. Active agents, regardless of operating system, can be upgraded using the user interface.
Agent configuration consists of assigning an agent to at least one environment; agents can be assigned to multiple environments. If an agent is assigned to several environments, it can perform work on behalf of all of them.
Agents can be grouped into sets of agents called agent pools.
You typically manage agents and agent pools in the Resources page of the user interface in the Agents / Pools pane. The Agent / Pools pane is shown in the following figure.
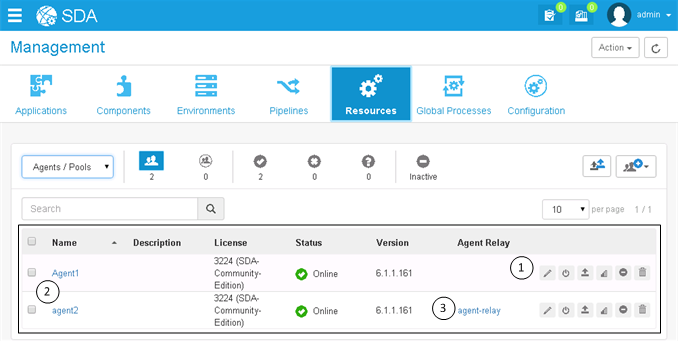
- Click an icon beside an agent or agent pool to do the following:
- Edit
- Restart
- Upgrade
- Test Connectivity
- Inactivate
- Remove
- Click the name link to open the page for a specific agent or agent pool.
- Click the agent relay name link to open the page for the agent relay to which an agent is connected.
For information on managing agents and agent pools through the web application, see the following topics: