To create a resource group:
- Navigate to Management > Resources.
- In the selection box, select Groups.
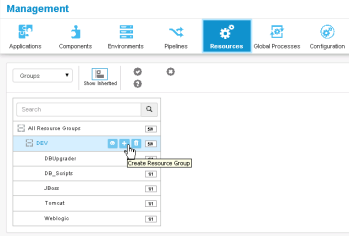
- Expand the All Resource Groups tree or search for the resource for which you want to create a resource group.
-
Beside the resource, click the
Create Resource Group icon as shown in the
following figure.
-
Enter the information needed to create the resource group as
follows:
Field Description Name Typically, the name will correspond to either the environment the resource participates in, the component that uses the resource group, or a combination of both, for example SIT, DB, or SIT-DB. Description Give a description that tells how you intend to use the resource to which this group is assigned. Type Select a type. Options are: - Static: Typical
- Dynamic: If you select this, you can add conditions to direct the system to find and select a resource name to add to the group. This lets you use name patterns so that resources of certain naming conventions are dynamically added to the group.
- To continue creating resource groups and stay in the list, click Save. To start configuring the resource group you just created, click Build Out. Once you assign a group to a resource, you can add sub-resources. A sub-resource enables you to apply logical identifiers, or categories, within any given group. During deployment configuration, you can select a given sub-resource that the process will run on.
- To create a sub-resource, click the Create Resource Group folder icon beside the group for which you want to add the sub-resource.