Creating Announcements and Articles

Knowledge Center articles and announcements can either be created directly by submitting a new item into Knowledge Management or by spawning an article from an incident, problem, or RFC. Both of these actions occur in Work Center.

Articles are submitted into the Knowledge Management Articles project. The articles are assigned to contributors, who add content to the article. Contributors can save the articles as drafts so they can work on them later.

Contributors can make two types of modifications to the articles: changes to the metadata and changes to the content. The metadata includes expiration dates, summary, visibility, and keywords; this data appears on the Details tab of an article. The Content tab is where you modify the actual content of the article.

Details Tab

The following sections describe article settings on the Details tab.

Article Type

Knowledge Management articles are divided into four types, and some types are associated with particular items. The four types with their respective items in parentheses follow:
  • Announcement (Changes)
  • FAQ
  • How To
  • Tech Note (Incidents, Requests, Tech Notes)

Announcements that are marked as urgent appear both in Knowledge Center and in the announcement bar below the Request Center banner.

Urgent Announcements

Select the Urgent check box to cause the announcement to be displayed prominently below the Request Center banner. Urgent announcements will still appear in search results on the Knowledge tab.

Users can navigate through the urgent announcements in the announcement bar by using the up and down arrows.

The arrow in the following illustration points to an urgent announcement in Request Center.image

Note: The IT administrator can disable the announcement bar in Request Center.

Article Category

Knowledge Center users can filter articles based on categories, which makes it easier to find articles. Knowledge Management articles are assigned to a particular category when they are created or modified.

To add, modify, or delete categories, use the Manage Data feature to access the KM Categories auxiliary table. You can open Manage Data from the options menu in Work Center.

You can choose an image to represent each category by clicking Change image. For more information, see Using the Image Picker.

Restriction: Modifying items in the KM Categories table requires the appropriate permissions.

Visibility

By default, articles have public visibility, which means that all SBM users can see them in Request Center. To make an article private, select Private in the Article Visibility field, and then select a group in the Visibility Group field. Only users and groups that are assigned to that visibility group can see the article on the Knowledge tab.

To add, modify, or delete visibility groups, use the Manage Data feature to access the KM Visibility Group auxiliary table.

Duration

Define how long the article will be available to users in Knowledge Center by selecting the Article Duration. Does not expire means that you define when the article becomes active in Knowledge Center; the article will not be removed automatically at a specific date. Expires allows you define both the Start Date and Expiration Date for when the article will be available in Knowledge Center.

For example, you may be performing maintenance on your e-mail server this weekend, and you want to inform your users that the services will be offline from noon to midnight on Saturday. You would set expiration date and time at the end of the Saturday. The announcement will no longer appear in Knowledge Center after the expiration date.

Users who have the privilege to submit articles can view expired articles by selecting Include Expired articles in Request Center.

Title, Summary, and Keywords

Provide a title and summary for the article.

When a user performs a Knowledge search in Request Center, the search is performed against all words in the content, title, and summary of the article. You can type additional keywords that you anticipate users will use to search in the Keywords field.

The words in these fields are also used for the item match search that is performed when a user submits an item.

Note: Search options need to be configured on the Smart Search tab in SBM Configurator. For details, refer to SBM Installation and Configuration Guide.

Content Tab

The content of the article is shown on the Content tab. The text is divided into sections.

Add content to the sections by placing your cursor in the section and adding the text. When editing text in non-title fields, the HTML editor opens, allowing you to apply formatting to the text and insert links or images.

When submitting a new article, the Content tab includes the ability to load an article template associated with the specified article type. The article template includes sample data and headings to assist in completing the different sections according to company standards.

You cannot add images to the article on the submit form. You must complete the submit form by selecting Save as Draft and then click Submit. This completes the submit process and creates the article. You can then Edit the article and add the image to the content.

Using the HTML Editor

The HTML editor allows you to format the text in your articles and announcements. The editor allows you to apply heading formats, add bulleted lists, format text, and insert images or links.

The HTML editor appears on the Content tab of the Submit and Edit transition forms in Knowledge Management.

To use the HTML editor:

  1. Select the text to modify or place your cursor in the section to add the text. The HTML editor displays the following menu:

    image

  2. Format a section by selecting it and then selecting the formatting, such as B or Heading 1.
  3. Insert an image by selecting the Insert tab and clicking image. Select whether to reference a URL for the image or to upload the image as an attachment.
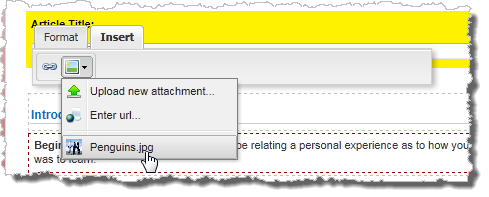
    Uploading the image as an attachment is a two-part process. First, select the insert image button to upload the image. This opens the Attachment dialog, where you can browse to the image. After the image is uploaded, select the insert image button again, and select the image from the menu.

    image

    The image should now appear in the text and will also be stored as an attachment to the item.

  4. Make text a link by selecting it and clicking image. The Link tab opens. Enter the URL for the link. The link will become active after the page is saved.

    Note that if text is not selected, the text New Link will be added. This text can be modified to change the name of the link.

    You can modify an existing link by clicking the link in Edit mode. This will open the Link dialog. Click image to remove the link.

Tip: The editor moves based on the focused field. You can keep the editor in one location by selecting the push pin and pinning the editor to that location.
image

Displaying Labels

Labels that appear on the right side of the Content tab help define what type of content each section should contain.

You can show or hide the labels by clicking the Show Labels or Hide Labels on the top of the tab.