Forms enable you to view and update information for work items. "State" forms provide a view of work items; "transition" forms provide an editable view.
Forms are perhaps the most customizable aspect of SBM. Your administrator can tailor forms to show or hide various elements, for example. Your privileges can also impact the information you can see and update.
Along with viewing and updating information, you can perform these actions from individual work items:
- Use transitions to move items through a workflow or business process.
- View details or a collaborative view, referred to as the Social view.
- Apply basic formatting to certain Text fields and to notes and e-mail messages
- Send e-mail messages about the items.
- Attach notes and files to items.
Transitioning and Updating Work Items
When you view a work item, buttons are typically available at the top of the form. Your administrator may move them to a different location on the form, however, and the transitions available to you depend on your privileges and the work item's current state in the process flow.
Modern transition forms provided by your administrator contain a control next to the Actions menu that helps you easily identify and satisfy all the required fields on a form. This control displays the total number of required fields on the form and maintains a running count of empty required fields that remain as you begin to enter data.
To transition a work item, click the appropriate button, provide data on the form as needed, and then click OK.
Working With Required Fields
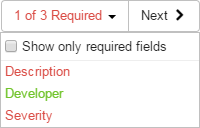
Modern transition forms provided by your administrator contain a control next to the Actions menu that helps you easily identify and satisfy all the required fields on a form. This control displays the total number of required fields on the form and maintains a running count of the required fields that you have completed. The following image indicates that there are three required fields that still need valid values.
Click the down arrow to view the entire list of required fields. Click a field in the list to give focus to that field on the form. This opens any inactive tab or collapsed expander that might contain the required field.

Once you enter a required value, click the Next button to give focus to the next required field. As you provide values for each required field in the list, the color changes from red to green.
You can also select Show only required fields to have the form only display required fields. This helps you complete a transition quickly when there are several required fields throughout a form.
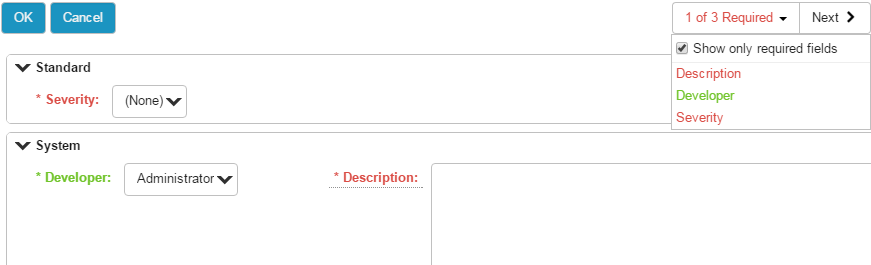
Once all the required fields have a valid value, the summary of remaining required fields turns green. If you attempt to complete the transition before entering all required values, a list of the remaining required fields appears at the top of the form. Click a field name in the list to give focus to that required field.

Sending E-mail Messages From Work Items
Use one of these methods to send an e-mail to users from any item:
- Click Send E-mail from the Actions drop-down. (This option is not available to users with External or Occasional User product access.)
- Click any user's name that appears as a link.
- Click the E-mail icon next to any Multi-User field. The users and groups selected in the field are added as e-mail recipients, up to a total of 100 users or groups. If you choose to use your preferred e-mail client, groups must first be removed from the recipient list.
You can add and remove recipients as needed.
Use the Rich Text Editor to format content as needed. Images, attachments, or hyperlinks that you add to the message are added as attachments to the current work item.
In the Template drop-down list, select the template you want to use for the message. If one or more external (non-SBM) users are associated with the item, you can select the External Template option. This automatically selects all external users in the To field. Otherwise, use the Internal Template.
You can also use your preferred e-mail client to format text. Depending on settings made by your administrator, the body of your e-mail messages may be attached to the current work item. Attachments are also added if your administrator has enabled this option.