In this use case, you add two
Text custom fields to the primary table:
Cities and
Name. Then you dynamically create an extended field list in a
Service step that populates these fields.
Note: In this use case, you use working data as input to the
ForEachNode loop, and the
ForEachNode loop creates an extended field
list as an input to the
UpdateItem step. The same logic can be used
when an event contains array records (that is, you have arrays included in the
Extension data in an event definition).
Instead of using the working data as the input to the
ForEachNode step, you can use the
EventNotice.
The orchestration workflow loops through each node and processes it as
follows:
- Sets the database name of the first field in the extended field list.
- Sets the value of the first field in the extended field list.
- Sets the database name of the second field in the extended field list.
- Sets the value of the second field in the extended field list.
- Updates the fields in the SBM item with information in the extended field list.
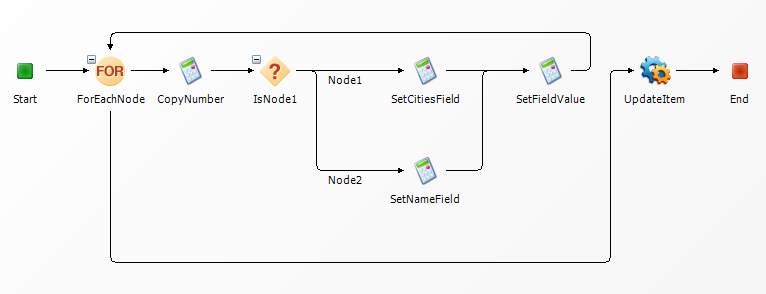
To dynamically create an extended field list that populates custom fields:
-
Add steps to the orchestration workflow as shown below.
-
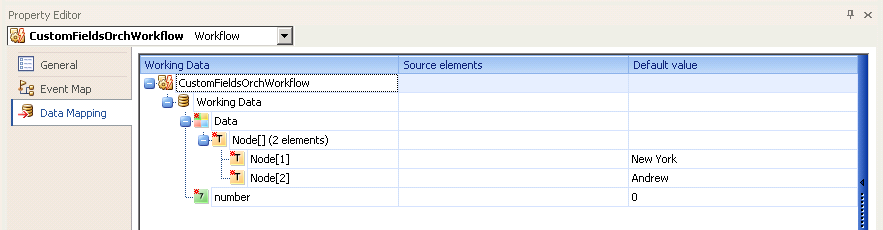
Define the working data for the orchestration workflow:
- Create an array with two array elements. Set a default value for each array element.
- Add a variable to store the number of loops through the ForEachNode step, using the type "Integer." Set the default value of the variable to 0.
-
In the
ForEachNode step, enter an expression that
describes the source of the data to be processed. In this example, the
Node array is the source of the data.

-
Configure the
CopyNumber step to store the number of times
the orchestration workflow loops through the
ForEachNode step.
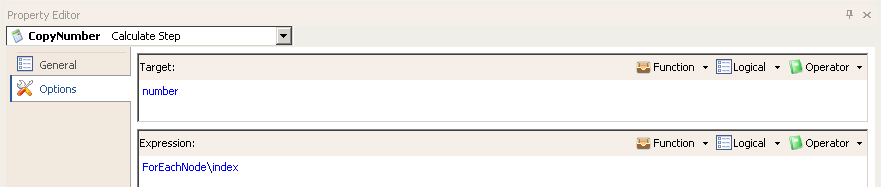 Note: This step must be included. You must copy the number of loops into the working data; you cannot use the ForEachNode step by itself.
 -
Configure the
Node1 branch to set the index value for the
"cities" node to "1."

-
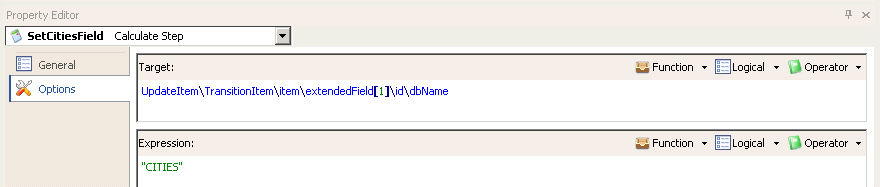
Configure the
SetCitiesField step to set the database name
of the first extended field to CITIES.
-
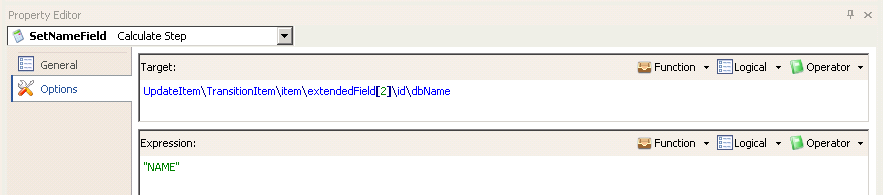
Configure the
SetNameField step to set the database name of
the second extended field to NAME.
-
Configure the
SetFieldValue step to set the value of the
applicable extended field.
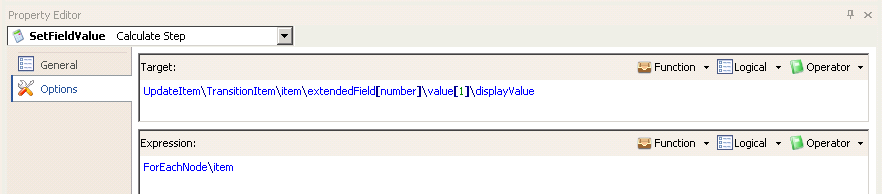 Note: In this use case, you use the first array element to create the CITIES extended field and the second array element to create the NAME extended field. The index used in the Target expression for the SetCitiesField and SetNameField steps shows the first array element using [1], and the second array element using [2]. The order in which these fields are defined in the application table does not matter; you can use any order in the orchestration workflow. However, after the order is set, the values for those fields must be in the same order. For example, after [1] is assigned "CITIES," its value will be extendedField[1].value[1].displayValue.
 -
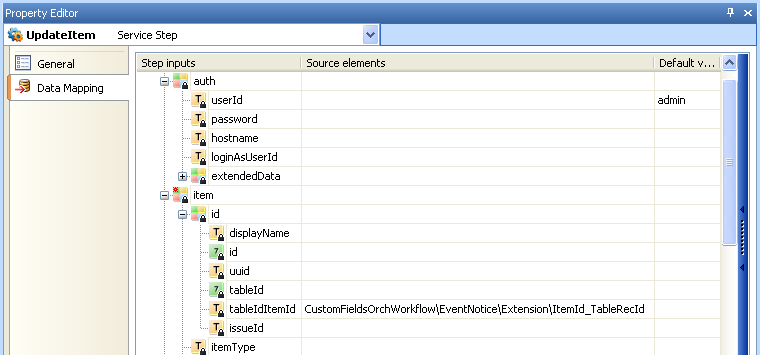
Configure the
UpdateItem step to populate the custom fields
in
SBM items.