Importing and Promoting the Serena Development Control Snapshots
The Serena Development Control Application is packaged as an SBM solution file which includes the following:
There are seven process applications included:
The following procedures are documented here to help you through the DVM-specific configuration process. For detailed documentation on promoting process apps, see the Serena Business Manager Application Administrator Guide.
|
|
|
NOTE The procedures here that are carried out in SBM are described in relation to SMB 2009 R4.03. In SBM 10.1 the Application Administrator is now called the Application Repository. Consult the appropriate user documentation for SBM 10.1, in particular, the SBM Application Repository Guide.
|
|
To use the application, you must import the solution to SBM as follows:
-
Select Start | Serena | Serena Business Manager | SBM Application Administrator.
-
Enter your login details.
-
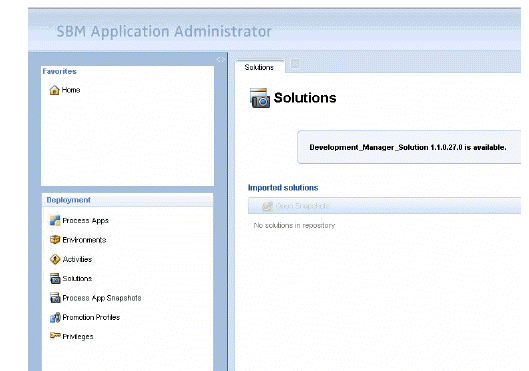
Click Solutions in the navigation pane under Deployment.
The solution pack is listed.
-
Click the Import button to import the solution file and extract the solution's snapshots and process apps.
An Import Solution dialog box appears, explaining which snapshots and process apps will be imported with the solution.
-
Click OK.
Selecting Solutions and clicking Imported Solutions shows the seven process app snapshots:
Creating a Default Environment
You must create an environment for your Serena Development Control process application unless you are promoting it into an existing environment. If you wish to use an existing environment, you can skip this section.
After you create the environment, you must set up a BPEL engine and SBM event manager for that environment.
To create the default environment:
-
From the SBM Application Administrator navigation pane, click Environments.
-
Click New above the list.
The New Environment dialog appears.
-
Fill out the form for the new environment as follows:
-
Enter a name and description.
-
For Composer, select Enable Deployment.
-
Under Application Engine Server, enter a name and description.
-
In the URL, change the server to localhost and specify the port number for the server. For example:
http://localhost:80/gsoap/gsoap_ssl.dll?sbminternalservices72
-
Click Test Connection to test the connection.
-
Click OK to save the environment.
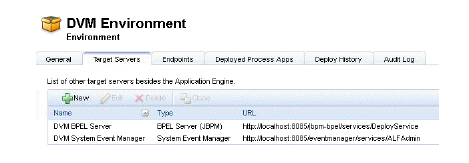
To set up the target servers, the BPEL engine and the event manager:
-
Select the new default environment and then select the Target Servers tab.
-
Click New.
-
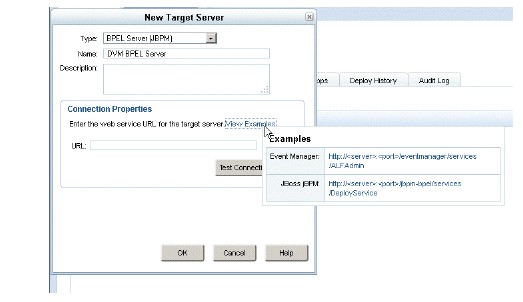
The New Target Server dialog appears.
-
Fill out the form as follows:
-
In the Type field, select BPEL Server (JBPM).
-
Name the server, for example: DVM BPEL Server.
-
Enter the URL using localhost as the hostname.
Port 8085 is the default, unless you specified a different port in the Configurator for your JBOSS server.
|
|
|
TIP Above the URL field, click View Examples and select from the examples. In the URL field, change the hostname and port.
|
|
-
Click Test Connection to test the connection.
-
Click OK.
-
Repeat Step 2 to Step 4 above for SBM Event Manager, with Type set to System Event Manager.