Advanced Reports

You can use the My Reports tab to display a list the reports available for an item. The My Reports tab is available from two modules: Tools and Projects. The My Reports tab in the Tools module displays all the item and resource reports that are associated with the team member using the My Reports tab. The My Reports tab in the Projects module displays only item-based reports and only those associated with the selected item. This view is identical to the Reports tab that is available from the Projects module.

Adding a report

Add a new report. Open the New Report dialog box. Name the report. Set the parameters and define its update frequency.

To add a report
  1. Open the Tools module.
  2. Select the My Reports tab.
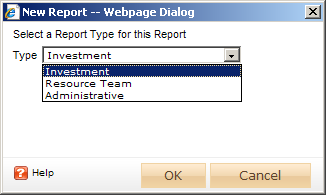
  3. Click New Report, select a report type (Investment, Resource Team, or Administrative) and then click OK.

    New Reports dialog box.

  4. In the New Report dialog box, type a name for the report.
  5. On the General tab, from the Report Template drop-down, select a report, enter a description (optional), and indicate whether you want to run the report immediately (after you are finished creating it).

    Choose a report.

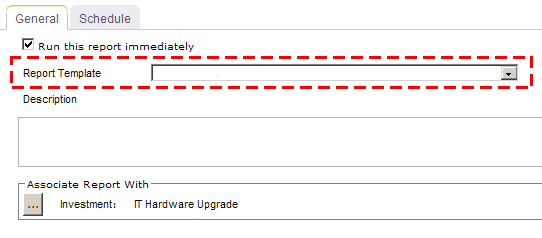
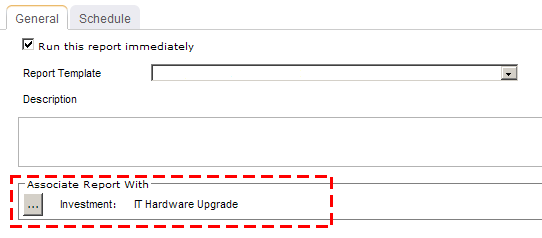
  6. Under Associate Report With, click the ellipses button and then use the Select Investments dialog box to identify the items that will be included in the report data.

    Choose an investment (or group of investments) to which the report will be associated.

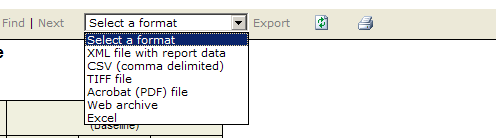
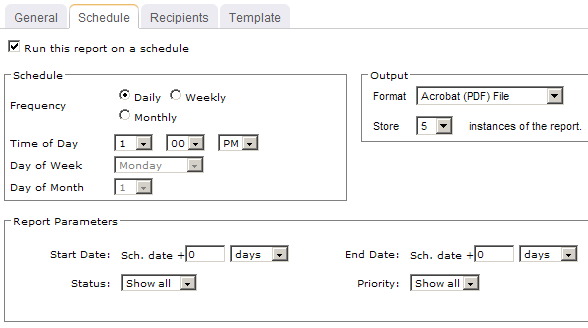
  7. On the Schedule tab, select Run this report on a schedule if you want the report to be run on a periodic basis. Once selected, you can define how frequently you want the report to be run, the format in which the report will be presented, and how many previous instances of the report you want to store.

    Indicate whether you want to run the report on a scheduled basis.

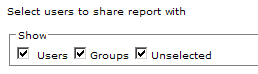
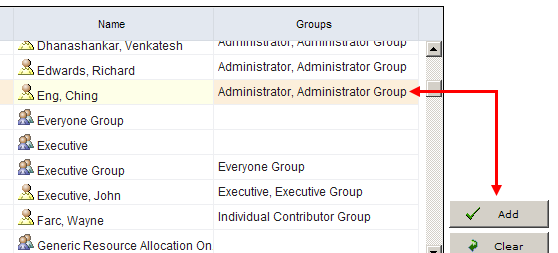
  8. If you have chosen to run the report on a scheduled basis, you can use the Recipients tab to select the users, security groups, and security roles who will receive a notification when this report is run. After you have chosen the recipients, click Add.
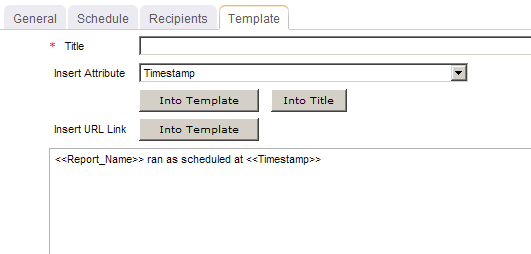
  9. If you have chosen to run the report on a scheduled basis, you can use the Template tab to define parameters for the email notification. You can define the title (as it will appear in the subject line). You can add the Timestamp and Report Name attributes into the title or the template (the message body). You can add a URL link into the message body that will allow any recipient to link directly to the report.

    Indicate whether you want to run the report on a scheduled basis.

  10. Click Save.

Copying a report

Add a new report by copying one that already exists.

To copy a report
  1. Open the Tools module.
  2. Select the My Reports tab.
  3. Select a report.
  4. Click Copy Report.
  5. In the Copy Report dialog box, name the report.
  6. Click OK.

Deleting a report

If you're not using a report, you can delete it.

To delete a report
  1. Open the Tools module.
  2. Select the My Reports tab.
  3. Select a report.
  4. Click Delete.

Editing a report

You can change the parameters that are included in the report and you can change the schedule frequency for how often the report is generated.

To edit a report
  1. Open the Tools module.
  2. Select the My Reports tab.
  3. Select a report.
  4. Click Edit Report.
  5. In the Edit Report dialog box, make your changes.
  6. Click Save.

Exporting a report

Reports can be exported to the following formats:
  • XML
  • CSV
  • TIFF
  • PDF
  • Web Archive (MHTML)
  • Microsoft Excel
To export a report
  1. Open the Projects module.
  2. Select an item.
  3. Select the Reports tab.
  4. Select a report.
  5. Click View Report.
  6. After the report has been generated, select the format to which you want to export the report: XML file with report data, CSV (comma delimited), TIFF file, Acrobat (PDF) file, Web archive, or Excel.

    Selecting the format into which you want to export a report.

  7. Click Export.

    Exporting a report into a selected format.

  8. Save the exported file to the location of your choice.

Sharing a report

Reports can be shared with other team members. Shared reports will be available in the My Reports tab of the team members with whom the reports is shared. Only the current instance of a report is shared and a report must be re-shared every time it is updated. A shared report can be modified by any user and/or member of a security group that has been given access to the report. A report that is not shared can only be modified by the user who created it.

To share a report
  1. Open the Tools module.
  2. Select the My Reports tab.
  3. Select a report.
  4. Click Share Report.
  5. In the Share Report dialog box, select whether you want to show users, groups, and/or unselected resources.

    Showing users and groups in the Share Reports dialog box.

  6. Select a user or group, and then click Add.

    Adding a user in the Share Reports dialog box.

  7. Click OK.

Viewing a report

Reports can be viewed from the Reports tab in the Projects or Tools modules.

To view a report from the My Reports tab
  1. Open the Tools module.
  2. Select the My Reports tab.
  3. Select a report.
  4. Click View Report.