Screen Shot

System Settings → Report Templates → System Reports → Rights by Resource Team by User
This report lists all of the rights a user has on all resource teams. Further, you can see where the rights are granted, from where they are inherited, and whether permission is denied at any level. This report can be run on only one user at a time.
Descriptions for the fields that are available in this report can be found in the following table.
| Field | Description |
|---|---|
| Action | The actions that are allowed. |
| Denied? | Indicates whether permission is denied. |
| Group | The name of the group to which the user belongs that gives the user permission to access the investment or resource team. |
| Inherited? | Indicates whether the rights are inherited from the parent investment or from the resource team. |
| Parent | The name of the parent investment or resource team. |
| Resource Team | The name of the resource team and the name of the role. This report can be sorted by resource team and by role, with either being selected as the primary filtering option. You can change the sort order from the Group By drop-down. |
| Rights | The rights granted to the user. |
| Role | The name of the role to which the user belongs that gives the user permission to access the investment or resource team. |
| User Name | The name of the user. |
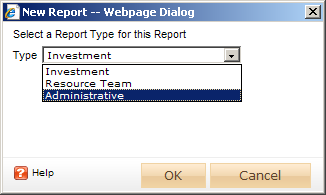
To add a report that uses the Rights by Resource Team by User report template, open the New Report dialog box from the My Reports tab and then follow the steps below.
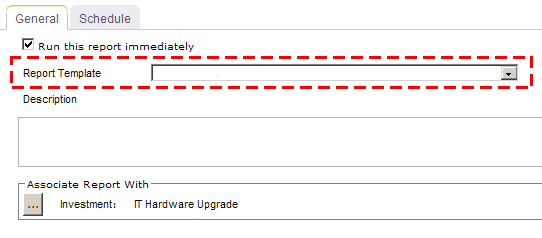
You can view the Rights by Resource Team by User report directly after adding it by selecting the Run this report immediately option in the New Report dialog box. (Reports can also be run from the My Reports tab in the Tools module or the Reports tabs in the Projects module.) Administrative reports do not have filter options.
Copyright © 2003–2011 Serena Software, Inc. All rights reserved.