Adding a user
There are two ways to add users. You can import them from a directory service such as Active Directory or Novell eDirectory. The other way to add users from the Manage Users module.
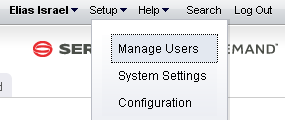
To add a user
- From the application toolbar, click Setup, and then choose Manage Users.
- Click
 Add.
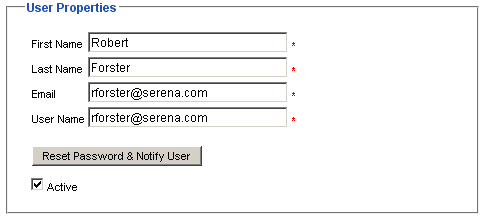
Add. - Under User Properties, enter the first name, last name, email address, and user name for the user.
- Click
 Save.
Save.