Adding a user
There are two ways to add users. You can import them from a directory service such as Active Directory or Novell eDirectory. The other way to add users from the Manage Users module.
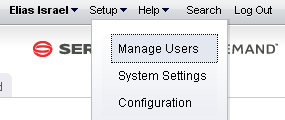
- From the application toolbar, click Setup, and then choose Manage Users.
- Click
 Add.
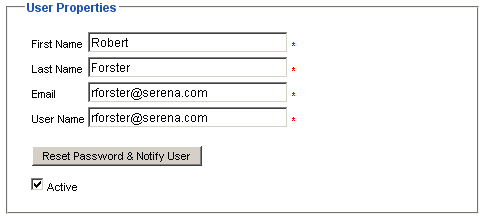
Add. - Under User Properties, enter the first name, last name, email address, and user name for the user.
- Click
 Save.
Save.
Assigning a user to a license
After you have created or imported a user, you must assign the user to a license and then assign the user to the applicable security roles and security groups. Users are assigned to licenses. Users should then be assigned to a security group before being assigned to a security role. Using a security group to assign groups of users to a security role can simply the tracking and management of permissions for users.
- From the application toolbar, click Setup, and then select Manage Users.
- Select the Security tab.
- Select the Users tab.
- Select a user.
- Under Licenses, select the check box next to each license you want to assign to the user. The license you assign the user to should be appropriate to the user's responsibilities in your organization.
- Click OK.
Deleting a user
If the user is no longer needed, you can delete it. It is recommended that you inactivate a user instead of deleting it.
- From the application toolbar, click Setup, and then select Manage Users.
- Select the Security tab.
- Select the Users tab.
- Select a user.
- Click Delete. Confirm. It is recommended that you inactivate users instead of deleting them.
Importing users and groups
You can import users from an existing network directory service, such as Active Directory or Novell eDirectory. You must first set up the authentication provider, which determines which users and/or security groups will be imported. You can configure the authentication provider to be run periodically. When the authentication provider is re-run, only new or changed data will be imported. First name, last name, status, and email address are used to determine which users are new and/or have been changed. A user's username, password, domain, and authentication provider will remain unchanged.
- From the application toolbar, click Setup, and then select System Settings.
- In the Import Users dialog box, select the authentication provider from which you are importing.
- The Import Users dialog box displays your authentication provider settings as read-only.
- Type the following in the Name and Password boxes: If the authentication provider you selected uses the Application authentication type, type the database user name and password in the corresponding boxes. If the authentication provider you selected uses the Active Directory authentication type, type the domain user name (such as user name), a qualified domain name (such as domain/username), or a full distinguished name (such as cn=username,ou=pretend, dc=domain, dc=com) and password in the corresponding boxes. If the authentication provider you selected uses the Novell eDirectory authentication type, type a full distinguished name and password in the corresponding boxes.
- Click Import. When users are imported, their user name and password are lowercase. When the import completes, click OK. If the import returns an error, check the authentication provider to ensure it is configured properly. Also ensure that the user context running the import has sufficient rights on the directory services server. If the user context does not have sufficient rights, the query will return null strings for those parts of the query the user cannot access. Once you have imported the users and groups, you can edit their information on the Users tab and Groups tab in the Security.